
How to Install a Log Cabin: Step-by-Step Guide and Video
- 1. Video: “Installation of a Log Cabin” by BHB
- 2. Preparing for assembly – what is worth knowing?
- 2.1. Checking the contents of the kit
- 2.2. Essential tools for the installation of a Log Cabin
- 3. Foundation – the basis for a stable construction
- 3.1. Why is the foundation crucial?
- 4. Types of foundations – which one to choose?
- 5. Assembling the walls and roof – step by step
- 5.1. Laying the first layer of logs
- 6. Assembling the walls
- 7. Installing the roof
- 8. Bertsch Holzbau’s offer – ready-made houses and professional assembly
- 8.1. Assembly options at BHB:
- 9. The most common installation mistakes – how to avoid them?
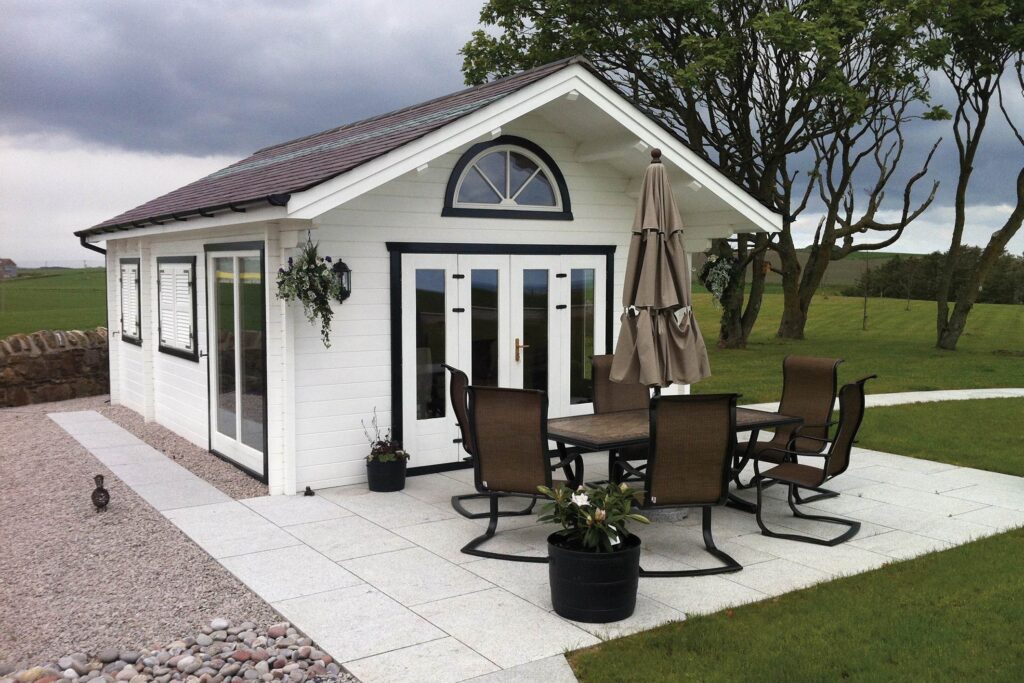
Installing a log cabin made of prefabricated elements is a great way to quickly and permanently create a functional garden space. Thanks to the ready-made components, the process is relatively simple, but it requires precision and proper preparation. In this guide, you will find detailed instructions on how to assemble a playhouse – from preparing the foundation, to assembling the walls and roof, to the final touches.
Video: “Installation of a Log Cabin” by BHB
Check out our video “Installing the Log Cabin,” where we guide you through the entire assembly process – from preparing the foundation to finishing the roof. We hope this video helps you successfully assemble your log cabin with confidence and ease.
Preparing for assembly – what is worth knowing?
Proper planning of the assembly process will help us avoid mistakes and delays, as well as facilitate and speed up our work. It is best to carry out the assembly work in favorable weather conditions – avoid heavy rain and strong wind.
Checking the contents of the kit
Before starting to assemble the cabin, it is worth checking the contents carefully. The manufacturer delivers prefabricated elements that should be assembled according to the enclosed instructions. Checking the completeness of the kit avoids problems during assembly and allows for the notification of any missing parts in advance.
The kit usually includes:
- wooden profiles (logs) – the main structural element that forms the walls of the house,
- floor and roof beams – necessary to create a stable base and a durable roof,
- windows and doors – prefabricated elements that are installed in designated openings in the structure,
- a set of bolts, screws, and mounting hardware – fasteners that ensure the durability of connections,
- assembly instructions – a document containing an assembly diagram and description for a specific model of the house.
| Tip: If you notice that a component is missing, contact the manufacturer before starting the installation. Missing one of the key components can significantly delay construction. |
Essential tools for the installation of a Log Cabin
Having the right equipment will help you avoid downtime in your work and make it easier to fit everything precisely.
List of tools necessary for assembling a Log Cabin:
| Tool | Application |
| Screwdriver | Installation of walls and roof, fixing of structural elements. |
| Level | Checking the levelling of the foundation and the walls of the bungalow. |
| Rubber mallet | Precise fitting of logs without risk of damage to the timber. |
| Drill | Drilling of mounting holes for fixing screws and bolts. |
| Hand saw | Trimming of elements if fitting of prefabricated elements is required. |
| Tip: Mounting tape, construction adhesives, as well as protective gloves and goggles to protect the eyes from wood splinters can also be useful. |
Foundation – the basis for a stable construction
Proper preparation of the ground prevents the structure from settling or tilting, but also protects the wood from moisture and damage. Choosing the right foundation depends on the type of soil, the size of the house and the intended use.
Why is the foundation crucial?
Without a proper foundation, the wooden structure can settle unevenly, causing cracks in the walls, deformation of doors and windows, and can also cause ventilation problems.
Key functions of the foundation:
- ensures the stability of the structure – even distribution of the weight of the house prevents subsidence of the building,
- protects against moisture – insulates wooden elements from the ground, which reduces the risk of rot and mould,
- improves durability – a properly selected foundation increases the lifespan of the house, minimising the risk of damage.
| Tip: If the terrain is uneven or muddy, consider a foundation on foundation bolts, which provide stability even on difficult ground. |
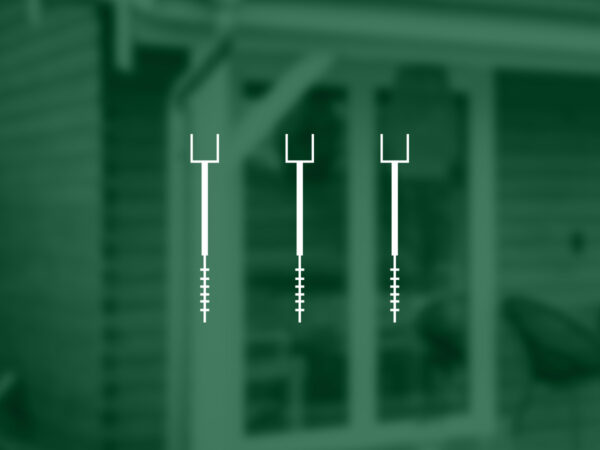
Types of foundations – which one to choose?
The choice of foundation depends on several factors:
- type of soil – sandy soil requires different foundations than clay soil,
- size of the house – the larger the structure, the more solid the foundation must be,
- planned use – a year-round house requires a more stable base than a seasonal gazebo.
| Types of foundation | Advantages | Disadvantages |
| Concrete slab | The most stable, moisture-resistant, durable construction. | High cost, long drying time, requires professional preparation. |
| Point foundation | Faster and cheaper to install, no concrete screed required. | Less stability on soft or uneven ground. |
| Concrete block | A cost-effective and easy-to-follow solution, it does not require complex groundworks. | Requires precise levelling, less durable than concrete slab. |
| Foundation on helical piles | Great for uneven terrain, quick installation, minimal ground disturbance. Durable and handles the load well. | The price may be higher than for a block foundation. |
Assembling the walls and roof – step by step
This stage requires precision and care, because the stability of the entire structure depends on the correct positioning of the walls. It is worth working according to the instructions and checking the verticality and level of the walls on an ongoing basis to avoid problems with subsidence or leaks later on.
Laying the first layer of logs
The first layer is the foundation of the walls of the house, so its precise positioning is crucial for the next stage of assembly.
1. Check the level of the foundation – before you start laying the logs, make sure that the foundation is completely level, as any unevenness can cause the structure to settle and make further assembly difficult.
2. Secure the bottom layer – it is a good idea to cover it with a wood preservative to protect it from moisture and mould. Special insulating tapes can be used to additionally protect the wood from contact with water.
3. Fit – the logs must be firmly seated on the foundations and the joints must fit exactly. It is important not to force the joints, but to fit them gently with a rubber mallet.
| Tip: If you encounter difficulties in fitting the logs, check that there are no unevenness in the foundation or that the logs do not need light sanding at the joints. |
Assembling the walls
After the first layer of logs has been laid correctly, the walls can be assembled, usually based on a tongue and groove system.
1. Joining the logs with a tongue and groove method – this system ensures that the walls are tight and stable, minimising the risk of gaps forming. Each log must be carefully inserted into the previous one, ensuring that it is correctly seated.
2. Plumb and level check – after laying each layer, it is worth checking that the walls are straight and stable. If necessary, they can be gently corrected using a spirit level and a rubber mallet.
3. Securing joints – some constructions use additional reinforcing elements, such as threaded rods or steel brackets, which stabilise the entire structure.
Installing the roof
Once the walls have been built, the roof structure can be installed. The process varies depending on the type of roof chosen, but the general principles are similar.
1. Installation of roof beams – first, the main structural beams that will support the roof must be fixed. Care must be taken to ensure that they are evenly spaced so that the weight of the roof is distributed throughout the structure.
2. Installation of the roof sheathing – formwork or rafters are placed on the roof structure to form the basis for the roof covering. It is important to ensure adequate ventilation so that moisture can evaporate freely.
3. Laying the roof membrane – the insulating layer protects against moisture and prevents leaks. It should be fixed with a slight overlap to prevent water from getting under the covering.
4. Roof covering – depending on the chosen material, the appropriate installation technique should be used:
| Asphalt shingles | It is laid overlapping and fastened with roofing nails. |
| Roofing felt | Mounted on the formwork and fastened with nails or glued with bitumen glue. |
| Roofing sheet | The sheets are screwed to the structure with roofing screws and the joints are sealed with bituminous tape. |
| Tip: If the roof is to be more resistant to damp and snow, it is worth using additional roof gutters to channel rainwater and protect the bungalow walls from damp. |
Bertsch Holzbau’s offer – ready-made houses and professional assembly
At BHB, we offer high-quality log cabin delivered in kits for self-assembly. They are designed for easy assembly, so that anyone with basic technical knowledge and the right tools can assemble the structures on their own. Each model comes with detailed instructions that guide you through the assembly process step by step.
For those who prefer to leave the assembly to the professionals, we also offer a comprehensive installation service – a professional team will take care of everything from preparing the foundation and assembling the walls to the final finishing of the house.
Assembly options at BHB:
Do-it-yourself assembly – the house is delivered as a prefabricated kit ready for assembly. All components are precisely matched, allowing for quick and trouble-free assembly according to the enclosed instructions. This is the ideal option for those who want to save on assembly costs and enjoy the satisfaction of building their own house.
Professional assembly – for customers who prefer comfort and the certainty of a solid construction, BHB offers a comprehensive assembly service. A team of experienced professionals will take care of the installation of the house in accordance with all standards, ensuring stability, durability and aesthetic workmanship.
Individual designs – BHB also offers the possibility to customize the house to individual needs. Modifications such as changing the layout of windows and doors, adding extra insulation or choosing a specific type of roof are possible.
Why use the assembly service?
- time saving – a professional assembly team can assemble the house even in a few days, which significantly speeds up the entire construction process.
- quality guarantee – installation by specialists ensures precise fit of elements, adequate protection against moisture and durability for years.
- safety – improper installation can lead to subsidence or roof problems. Using a professional installation service minimises the risk of errors.
| Tip: If you choose to assemble it yourself, plan the whole process in advance and make sure you have the right tools and the support of an extra person to make it easier to assemble larger pieces. |
The most common installation mistakes – how to avoid them?
Even small shortcomings can lead to problems such as structural instability, leaks or roof damage. To avoid costly repairs, it is advisable to pay attention to the most common mistakes and use tried and tested solutions.
| Problem | Solution |
| An uneven foundation leads to an unstable structure. | Always check the foundation level before installing the walls and correct any unevenness. |
| Errors in wall assembly – leaking joints can weaken the structure. | Check each profile before installation and carefully seat the logs, ensuring a close fit. |
| Improper installation of the roof – can cause leaks and weaken the structure. | Make sure the roof membrane is well laid and secured and the roofing is installed according to the instructions. |
Assembling a profile house is a process that requires adequate preparation, but it is possible to do it yourself. However, if you are inexperienced, it is worth using an assembly service offered by Bertsch Holzbau.